Here’s your first guide to groovy blues guitar rhythms!
the shuffle: what it is
The guitar is a minimalist instrument: it is six wires attached to a piece of wood. Yet despite its simplicity I’m consistently amazed at the emotion those wires can evoke. One thing I love about the blues shuffle is that all you need to make this driving groove happen is two strings and a desire to rock. (Or, you know, to “blues.”)
This is going to involve some tablature reading, so if you need an itty bitty primer on reading tablature have a look at “The Right Notes: A Step-by-Step Guide on How to Read Guitar Tablature.”
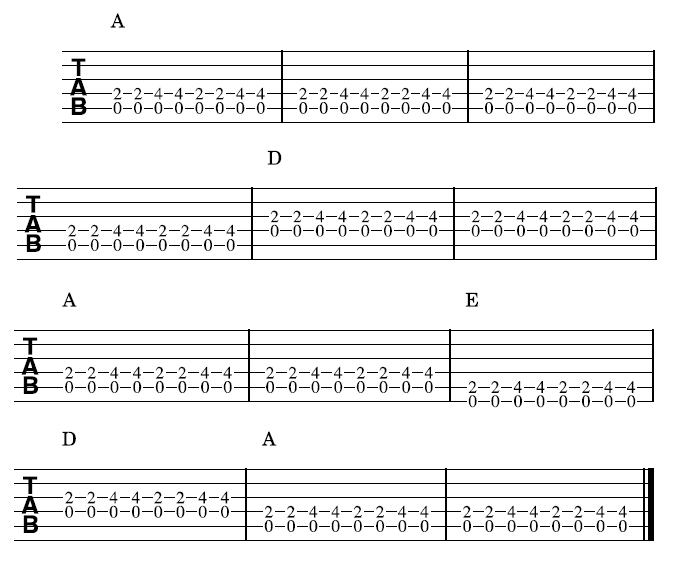
The shuffle we’re going to play is a 12-bar blues in the key of A. I won’t show you chord charts because there are no full chords involved here, only two strings at a time. In the key of A one of those strings is always open (no fingers on the frets).
Below is the tablature for the shuffle. You’ll see it doesn’t look too daunting. Incidentally, I use the outstanding MuseScore to make tabs and sheet music; I can’t overstate how awesome this app is. There’s a learning curve, but it’s worth your time if you’re interested in creating your own tabs or sheet music.
the shuffle: the groove

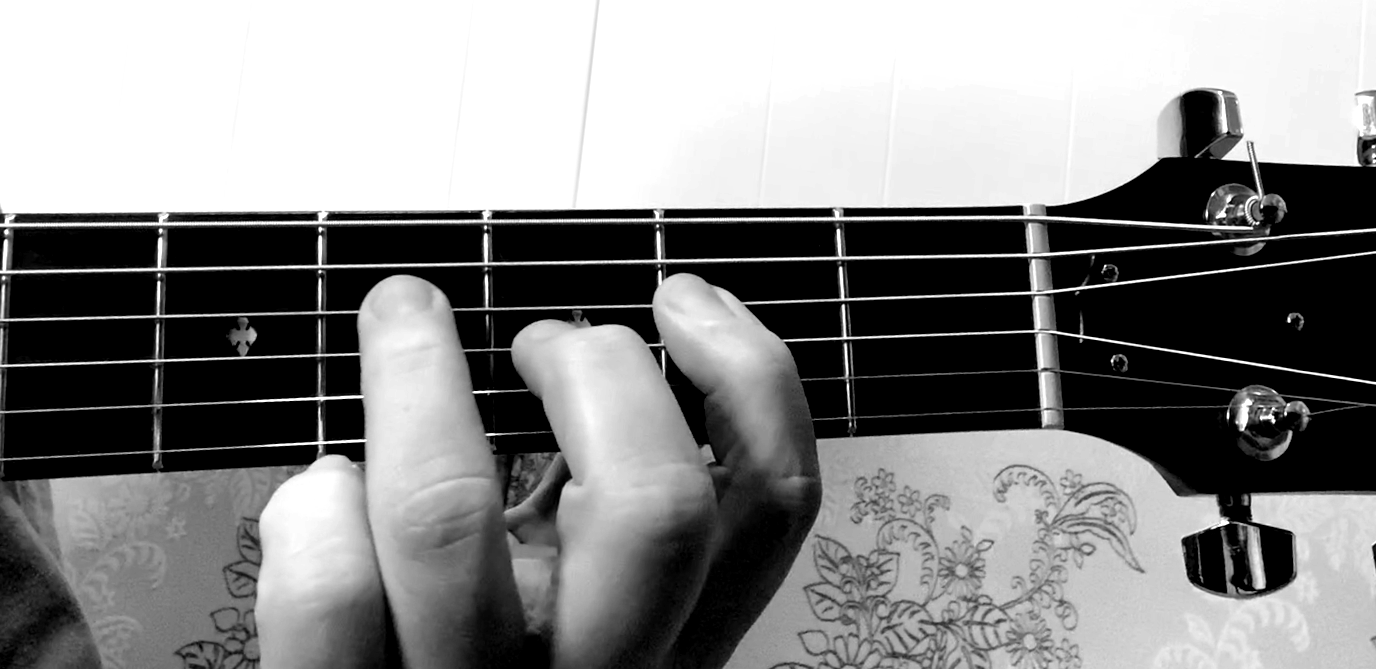
- With your fret hand use your index finger on the 2nd fret and your ring finger on the 4th fret. If you’re new to guitar this might feel like a stretch for you. The ideal here is to keep one finger per fret.
- When you’re not using your ring finger, keep it close to the string, ready to jump into action. It’s a huge time saver (really).
- When the ring finger is down on the 4th fret, leave your first finger down on the 2nd fret. Even though we can’t hear it while the 4th fret is being played we’re coming right back to the 2nd fret, so just leave it there to save time and effort.
some tabs and a play-along
Below is the tablature, and below that is a recording for you to play along with. Have fun!


